node.js tcp chatting server with QT client
node.js로 구현한 채팅 서버 및 QT로 GUI를 꾸민 클라이언트이다. 사용자 등록, 로그인, 대화상대 추가/삭제, 로그인/아웃 알림 및 메시지 전달 기능이 구현되어 있다.
Current features:
- enroll user
- add/remove friend
- login and retrieve my friend list
- notify logged in/out
- deliver chat message
Server
net, Buffer module을 이용해서 작성되었다. 클라이언트와 주고받는 패킷의 정의는 다음과 같다.
The Packet format is : binary data + string
4 byte header (means a length of following message) + message
The message format is :
string|(delimiter)...
제일 먼저 32비트 정수가 포함되고 이후에는 문자열로 구성된 양식이다.
헤더와 메시지를 구분하는 별도 구분은 없다. 문자열의 길이는 이 32비트 정수에 설정 된다.
메시지의 형식은 먼저 사용 목적이 나오고 이후 구분자로 구분된 데이터들이 전송된다.
예를 들어 로그인의 경우라면 전달되는 전체 데이터는 다음과 같게 된다.
ex) Login message
4byte_integerLOGIN|SomeUserId|SomePassWord~
즉, 바이너리 데이터와 문자열이 포함되는 형식인데, 결국 다음과 같은 C 구조체가 전송되는 것과 같다.
typedef struct _PACKET_LOGIN
{
    unsigned int nLen; //4byte, contains 34
    char szMSg [30];
} PACKET_LOGIN;
이러한 구조체 데이터에 nLen 에는 문자열의 길이 (30)이 설정되고 szMSg 에는 "LOGIN|someUserId|SomePassWord~" 문자열이 담겨져서 node.js 서버로 전송되는것과 같다.
그러므로 전체 데이터의 길이는 헤더에 설정된 메시지 길이(30 byte) + 헤더 자체의 길이 (4byte) = 34 byte가 된다.
인터넷에서는 echo 서버, 혹은 단순히 클라이언트의 데이터를 받는 즉시 브로드캐스팅하는 예제를 볼수 있다. 하지만 tcp의 메시지 경계 없음으로 인한 데이터 fragmentation을 고려해줘야 제대로 동작하는 서버를 작성할수 있다.
이 때문에 전달되는 데이터가 완전한 하나의 패킷이 될때, 해당 처리를 해주고 만약 기대하는 길이만큼 전송이 다 되지 않았다면, 지금까지 받은 데이터를 누적시키는 작업이 필요하다.
전달되는 데이터가 모두 문자열이라면, 일반 변수를 사용해서도 가능하겠지만, 지금 구현하는것은 헤더부분이 32비트 정수형이기 때문에 (즉 바이너리 데이터 + 스트링 의 혼합) 뭔가 다른 방법이 필요하다.
이때 node.js 가 제공하는 Buffer 모듈을 사용하면 문자열 데이터 뿐만 아니라, 정수형 데이터도 처리가 가능하다.
소켓으로 데이터가 전달될때의 처리는 다음과 같다.
var accumulatingBuffer = new Buffer(0);
var totalPacketLen = -1;
var accumulatingLen = 0;
var recvedThisTimeLen = 0;

c.on('data', function (data) {
    recvedThisTimeLen = data.length;
    console.log('recvedThisTimeLen=' + recvedThisTimeLen);
    var tmpBuffer = new Buffer(accumulatingLen + recvedThisTimeLen);
    accumulatingBuffer.copy(tmpBuffer);
    data.copy(tmpBuffer, accumulatingLen); // offset for accumulating
    accumulatingBuffer = tmpBuffer;
    tmpBuffer = null;
    accumulatingLen += recvedThisTimeLen;

    if (recvedThisTimeLen < packetHeaderLen) {
        return;
    } else if (recvedThisTimeLen == packetHeaderLen) {
        return;
    } else {
        if (totalPacketLen < 0) {
            totalPacketLen = accumulatingBuffer.readUInt32BE(0);
            console.log('totalPacketLen=' + totalPacketLen);
        }
    }

    while (accumulatingLen >= totalPacketLen + packetHeaderLen) {
        var aPacketBufExceptHeader = new Buffer(totalPacketLen);
        accumulatingBuffer.copy(
            aPacketBufExceptHeader,
            0,
            packetHeaderLen,
            accumulatingBuffer.length
        );

        ////////////////////////////////////////////////////////////////////
        //process packet data
        var stringData = aPacketBufExceptHeader.toString();
        var usage = stringData.substring(0, stringData.indexOf(TCP_DELIMITER));
        console.log('usage: ' + usage);
        //call handler
        serverFunctions[usage](
            c,
            remoteIpPort,
            stringData.substring(1 + stringData.indexOf(TCP_DELIMITER))
        );
        ////////////////////////////////////////////////////////////////////

        var newBufRebuild = new Buffer(accumulatingBuffer.length);
        newBufRebuild.fill();
        accumulatingBuffer.copy(
            newBufRebuild,
            0,
            totalPacketLen + packetHeaderLen,
            accumulatingBuffer.length
        );

        //init
        accumulatingLen -= totalPacketLen + 4;
        accumulatingBuffer = newBufRebuild;
        newBufRebuild = null;
        totalPacketLen = -1;

        if (accumulatingLen <= packetHeaderLen) {
            return;
        } else {
            totalPacketLen = accumulatingBuffer.readUInt32BE(0);
        }
    }
});
Buffer 의 copy 메서드를 사용하여 동적으로 버퍼를 할당하여 데이터를 누적시켰다.
accumulatingBuffer.readUInt32BE(0) 를 사용하여 4바이트 정수값을 읽어서, 헤더를 제외한 메시지의 길이를 구한다.
네트워크 바이트는 빅엔디언인이기 때문에 xxxBE() 함수를 사용한다.
이후 버퍼에서 실제 문자열 메시지를 읽을때는 헤더길이(4)만큼 offset 을 주고 버퍼에 접근하면 된다. 즉,
accumulatingBuffer.copy(
    aPacketBufExceptHeader,
    0,
    packetHeaderLen,
    accumulatingBuffer.length
); // offset header length
이부분이 offset만큼 간격을 두고 버퍼에서 메시지 문자열만을 얻기 위한 부분이다.
이처럼 일반적인 C언어 구조체와 같은 형식도 node.js Buffer 를 사용하면, 자유롭게 연동이 가능하다.
사용자 정보, 대화상대 정보 등은 sqlite 데이터베이스에 저장하는것으로 하였다. 이를 위해 node-sqlite3 가 사용 되었다.
클라이언트로 데이터 전송시에도 헤더 설정이 필요한데, 이때는 writeUInt32BE 함수가 사용되었다.
Client
QT 를 이용하여, 간단한 GUI를 가진 것으로 작성 하였다. node.js서버에서는 클라이언트 요청에 대해 다음과 같이 응답을 해준다.
Responses:
ex) if adding friend is success :
4byte_headerADDFRIEND|OK|friendid|online

ex) if adding friend is failure :
4byte_headerADDFRIEND|FAIL|err-string
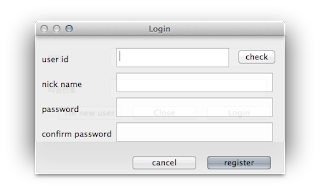
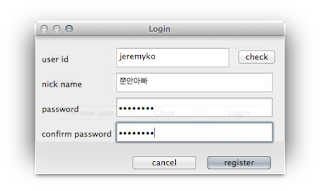
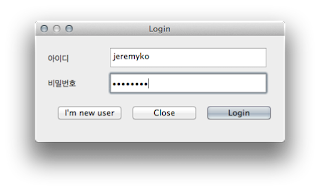
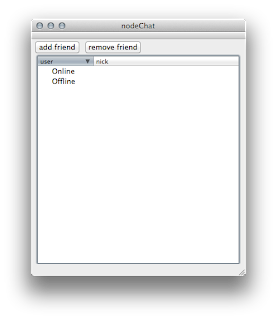
아래 스크린샷과 소스를 참고.
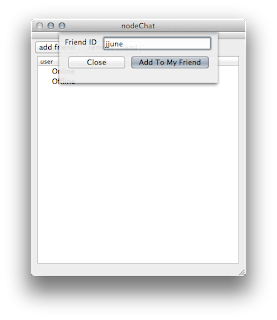
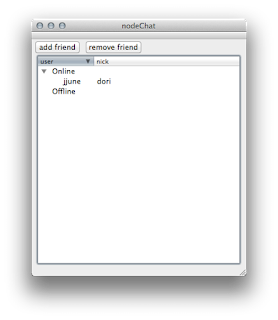
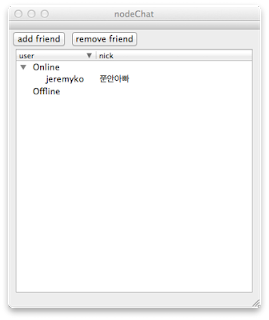
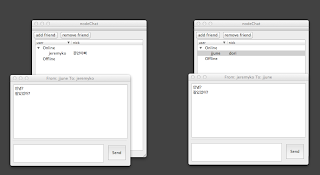
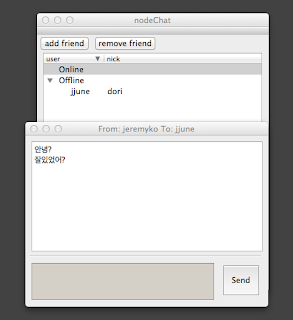
소스는 다음에서 다운로드 할수 있다.